
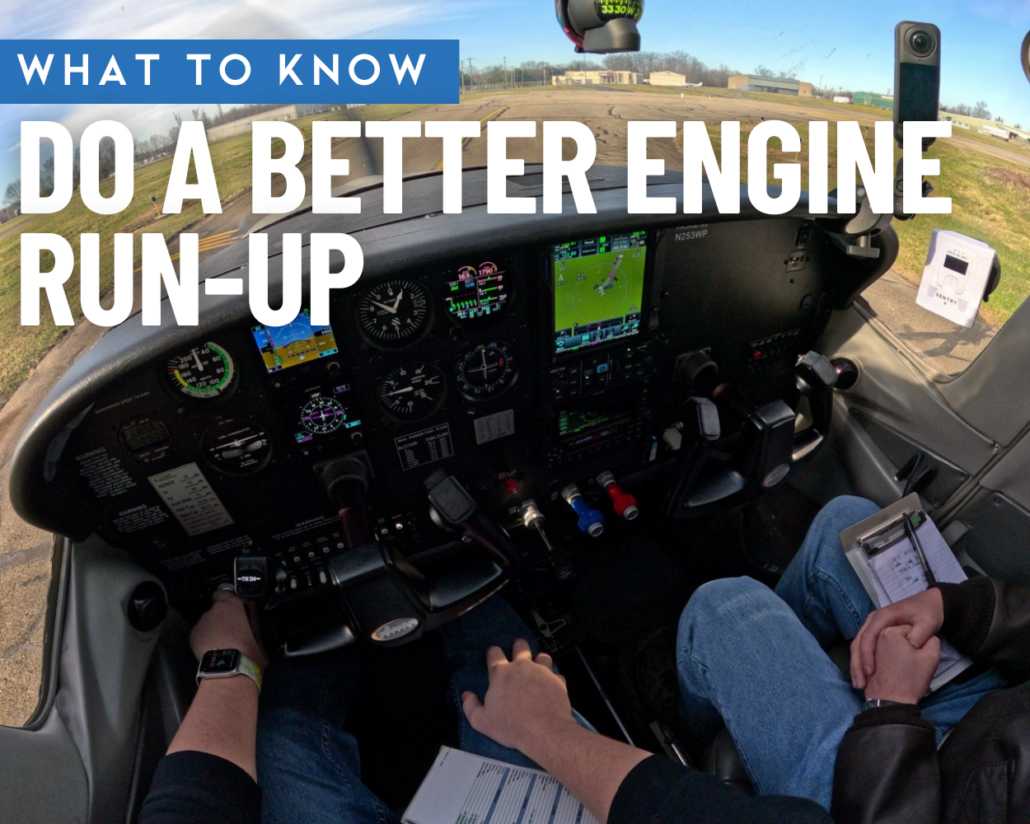
Do A Better Engine Run-up
|
Getting your Trinity Audio player ready...
|
Editor’s Note: We’re pleased to welcome Ryan Koch to Flight Training Central. Ryan leads course development at PilotWorkshops and is the architect behind several of its advanced online training programs including the Engine Operations Course. An active instructor, he focuses on helping pilots understand not just procedures, but the systems and decision-making behind them. In this article, he takes a fresh look at a routine task most pilots rarely reconsider: the engine run-up.
Run-ups Aren’t Just a Ritual
You’ve done dozens upon dozens of run-ups by following the factory checklist by rote—and it works. But that checklist was designed when the airplane was, and for much of the GA fleet that means 50+ years ago. That’s before widespread per-cylinder engine monitors and before we’ve collectively learned as much as we have about how these engines misbehave in real life.
Here are a few easy ways to get more out of a normal run-up, even in a simple carbureted trainer.
Ignition Check
It’s better to think of this as an “ignition check” rather than just a “mag check.” You’re not just checking the magnetos here, but the entire ignition system: spark plugs, wiring, harnesses, and the switch itself.
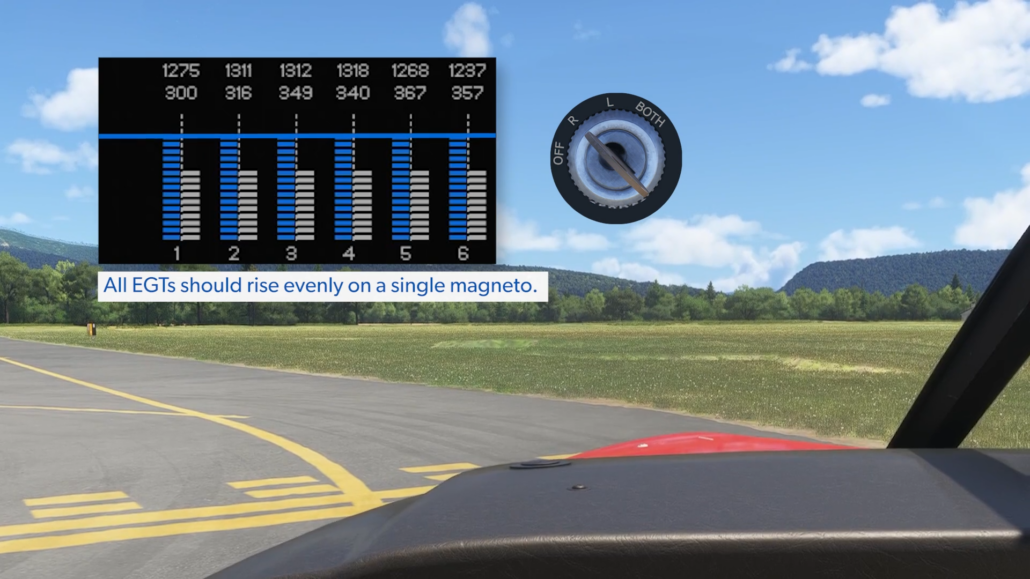
With a digital tachometer, it’s tempting to chase the exact RPM listed on the checklist, but in practice that level of precision isn’t necessary. Most engine monitors have a “normalize” mode that levels all EGT and CHT bars at their current values and increases their sensitivity. Use that here, because the next step is watching EGT behavior as you isolate the individual magnetos—and normalizing makes changes easier to see.
When you switch to operation on a single magneto, all of the EGT bars should rise together by roughly the same amount. Rising temps may feel counterintuitive. The reason is that with only one spark plug firing, complete combustion takes longer. More of the burn is still happening later in the cycle, so the exhaust gas is hotter when it passes the probe.
If the EGTs don’t rise together, you’ve spotted a problem and learned something valuable. For example, if selecting the right magneto causes cylinder three’s EGT to fall instead of rise, the issue is likely related to the plug in that cylinder powered by the right magneto. That kind of information is far more useful to a mechanic than a vague report of roughness.
The most common issue you’ll turn up this way is a fouled spark plug, which typically presents as a drop in one EGT accompanied by engine roughness. Often you can fix it on the spot by generating enough heat to burn off deposits. Begin by setting a higher-than-runup RPM—something around 2000 RPM for most fixed-pitch propellers, or about 2200 RPM for a constant-speed propeller. Leave the ignition on the BOTH position. Then, lean the mixture for around peak RPM and leave it there for 30 to 60 seconds. This will feel like a long time, so set a timer. When the time’s up, return to the normal runup RPM and try again. If the problem persists, it’s reasonable to try just once more before calling it a day and calling your mechanic.
After the ignition check, be sure to return the key to the BOTH position. A helpful habit is using the sequence RIGHT, BOTH, LEFT, BOTH, so the final step is a single click back to normal operation.
Carb Heat
Applying carburetor heat normally results in a 100–200 RPM drop as the incoming air is warmer and less dense. The exact RPM drop varies by airplane, so know what’s normal for yours.
If you have a carb temp gauge, you can see direct evidence of this temperature rise. When aircraft are certificated, the FAA requires that carb heat cause a rise of at least 90°F at 75% power. In practice, you probably won’t see that much change—especially at lower runup power on an engine that hasn’t fully come up to operating temperature yet—but the rise should be enough to reliably take you out of the danger zone and melt ice in flight.
If the RPM drop is unusually small or the carb temperature doesn’t rise as usual, several things might be going on. There could be a leak in the carb heat system allowing relatively colder outside air to mix with the heated air. There could be a restriction in the normal intake, like a blocked air filter, that’s already reducing power and masking the difference. Or it may be that the carb heat door is not fully closing, leaving partial heat on all the time.
One practical way to guard against that last possibility is to make sure that when carb heat is off, the control reaches its mechanical stop before the knob reaches the panel. If the knob reaches the panel first, you can’t know if the carb heat door is actually closing.
Finally, it’s worth waiting 5–10 seconds with carb heat applied. If any carb ice has formed since engine start, you’ll likely feel some temporary roughness as the ice is melted and ingested, followed by smoother running and an increase in RPM.

Fuel
Fuel starvation and exhaustion remain leading causes of engine failure, and many are preventable before takeoff. Fuel gauges must be reasonably accurate and should confirm the amount of fuel you measured before flight. There’s a misconception that the gauges aren’t legally required to be accurate except when the tanks are empty, but that’s not true.
If you have a fuel totalizer, it can be an even more precise measure of fuel remaining—but only if it’s been initialized to the known starting fuel and calibrated properly. When it is, it becomes one of your best tools for managing range and reserves, so check it here.
Most Before Takeoff checklists call for the fuel selector to be on the appropriate tank. But avoid changing tanks right before takeoff. If the newly selected tank has a restriction or pickup problem, you may not discover that for several minutes—possibly right after takeoff when options are limited. Instead, select the proper tank before starting and verify it again before takeoff.

Ready for Takeoff
Many POHs will say something like, “The engine is ready for takeoff when the throttle can be advanced to full without the engine stumbling.” True—but how will you know until you try?
A good rule of thumb is to keep the throttle below 1000 RPM until the oil temperature is at least 100°F. On very cold days, you may have to compromise and use the runup to get there, but take your time and be gentle. Heating a cold engine too fast is a recipe for wear and tear and reduced longevity.
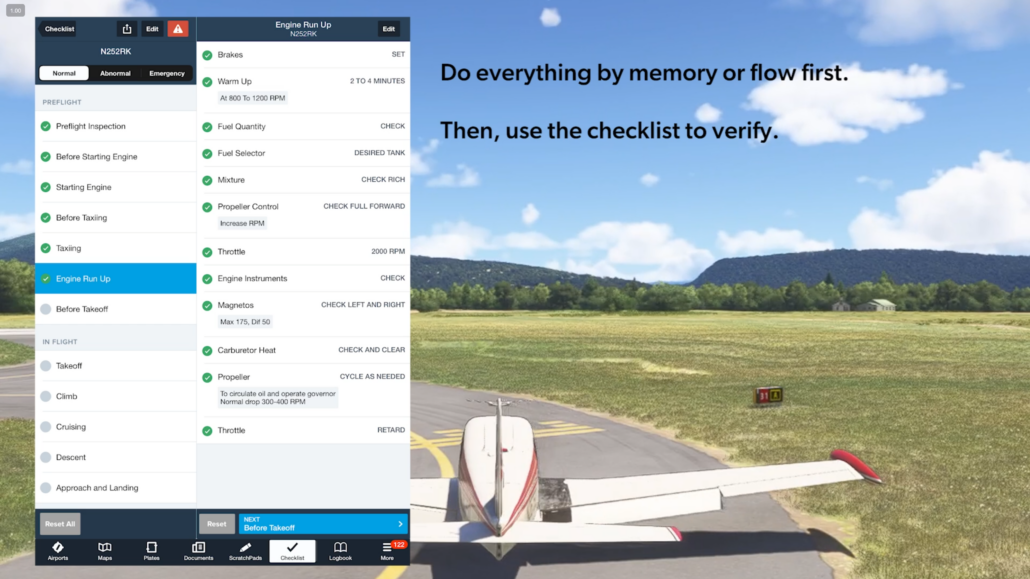
Do It, Then Check It
Following the checklist verbatim works great when you’re learning the steps. But once the steps become familiar, there’s a way to make them more effective. Work through the run-up from memory using a consistent flow pattern or simple mnemonic. Then, when everything is complete, pull out the checklist and verify that nothing was missed. Used this way, the checklist becomes a true backup and redundancy rather than a simple script to recite. You’ll also find you’re more mentally engaged in the process.
A better run-up doesn’t have to take longer than a basic one. It just uses the information available more intelligently—and gives you confidence that the engine is healthy before you commit to the takeoff roll.
Reader Poll
Postscript: This article is adapted from the Engine Operations Course from PilotWorkshops, where we go deeper into ignition systems, fuel management, carb ice, and what engine monitors are really telling you. If you want to understand what’s happening under the cowling, that course is a great next step.

Ryan was the driving force behind the development of several PilotWorkshops online courses, including Instrument Rating Accelerator, IFR: The Missing Lessons, Garmin GTN: Next Level, and Advanced IFR. Ryan is also a contributing expert for PilotWorkshops’ IFR Mastery series and is a regular participant in the Instructor’s Roundtable. He teaches ground schools, runs ATC communications courses for both IFR and VFR pilots, and has developed curriculum for a variety of IFR proficiency programs, and a simulator-centered high school aviation program.
- Do A Better Engine Run-up - March 16, 2026
Not a fan of leaning to clean/burn off what ever from a spark plug. Doing this , especially at run up when cylinders are relatively cold can cause excessive cylinder wall and or piston ring wear and could potentially crack a cylinder.
I got it that it gets you flying sooner rather than later but if the engine has this issue more than once it might be time to take a deeper dive into the problem or as most experienced mechanics will tell you , pay me now or more later.
Happy Flying
One additional note about the carb heat check; with the carb heat applied and then bringing the throttle to idle, the engine should idle low but not die. If it does it likely indicates an exhaust leak bringing exhaust gases into the induction air and causing the engine to quit and/or an improperly set idle mixture adjustment. Either way, if the engine does quit, squawk it, ground it and inform maintenance.
I also wanted to emphasize checklists; at no point should checklists be optional. Their appearance throughout every ACS is there for a reason and no pilot should ever believe there will be a point where one shouldn’t be used for the various phases of flight. History, as documented in NTSB reports and major air disasters, has shown that memory fades, distractions create omissions and overconfidence kills. I’ve seen too many macho ‘experienced’ pilots believe that checklists are for student pilots, when in actuality the ‘experienced’ pilots are often less disciplined and prone to multiple errors and have developed several bad habits when compared to a student/learner pilot.